Wednesday, November 14, 2012

Sugarsync - Syncing Nework Shared Data

[Nerd Scale: 2 out of 5 pocket protectors]

I spent a lot of time testing out some of the most popular Cloud File Storage software available and settled on using Sugarsync as my software of choice.   There are two main reasons why I chose Sugarsync:

(1) Unlike most of the other software, such as Dropbox, you don't have to create a separate folder to store your 'synced' data and manually drag your files to that folder.   Sugarsync works much like Carbonite backup does.  You install the software and designate which folders you wish to synchronize to the cloud.

(2) When sharing folders with other users, Sugarsync requires authentication to view the data.   There are some Cloud File Storage software out there that does not require a username and password to view shared data.   In my opinion, that is too big of a security risk.

The one thing that really bothers me about all Cloud File Storage solutions out there is their inability to synchronize network shared data.   In the real world, IT Admins tend to store USER data on servers and configure user workstations to redirect their My Documents to these network folders.   This allows IT Admins to be able to centralize storage, which makes data backup and restoration much simpler.

However, storing the data off of the workstation makes it nearly impossible to use programs like Dropbox or Sugarsync to synchronize this data.   I assume one day, Sugarsync will release a version of software that will accomplish network syncing, but until then what do you do?

Well, I came up with a solution.   By using Symbolic Links, you can get Sugarsync to sync data on a network shared drive.   There are a couple of caveats to acknowledge about this process:

(1) Sugarsync does not 'watch' a symbolic linked folder like it does regular folders.   If a new file or folder is added to the symbolic linked folder, Sugarsync does not automatically detect the new file or folder creation, which prevents the file from being synchronized.   The Sugarsync software has to be shutdown and restarted.   But once restarted, it detects the new file or folder, synchronizes it and begins watching it.   If changes are made to those files or folders, Sugarsync will synchronize them.   But if new files are created, you must repeat the process of restarting the Sugarsync software.

(2) Unlike locally stored folders, Sugarsync will not allow you to exclude files or folders from the Symbolic Linked Folder.  This means all the data within this folder will be synced.

(*UPDATE* Sugarsync has released the Beta 2.0 software and it does allow you to exclude subfolders within the Symbolic Linked Folder.)

But if you can get past these two shortcomings, you should be able to get Sugarsync to sync network shared data with very little effort.   Here is how it is done:

(1) Create a network shared folder.   In my example, I have created a folder called 'SugarSyncTest', located on my Buffalo NAS device.  The path to this folder is \\linkstation2\share\sugarsynctest

I added a TXT file and Folder to this network shared folder for testing purposes:


(2) Now, you need to create a folder on your local computer that will store the Symbolic Link.  Sugarsync will not allow you to directly add a symbolic linked folder, so the link must be a subfolder of a folder that you will have Sugarsync use.   In this case I created a folder called

C:\SugarSyncLink

(3) Open the Sugar Sync Manager software and add the folder that you created in step 2 by choosing Add Folders to SugarSync | Add More Folders and selecting the C:\SugarSyncLink folder.  This folder must be syncing with SugarSync prior to creating the symbolic link to your network data.

(with the new Beta 2.0 software, you can simply drag and drop your folder to the Sugarsync management software)

(4) After creating the local folder, you will need to create a symbolic link that connects to that share.   Start the symbolic link creation by launching the Command Prompt as Administrator:


(5) At the command prompt type this command:

 mklink /D C:\SugarSyncLink\SugarNetData \\linkstation2\share\sugarsynctest


This command makes a Directory Symbolic Link called 'SugarNetData', located in the
C:\SugarSyncLink folder, which links to the network share of \\linkstation2\share\sugarsynctest

You would change \\linkstation2... to the path of your network share.

(6) If you navigate to the C:\SugarSyncLink\SugarNetData folder and open it, you will see the contents of the \\linkstation2\share\sugarsynctest folder.

(7) If you take a look at the newly added folder in the SugarSync manager, you will notice that it doesn't contain any data.

If you close SugarSync and re-open, it will begin the synchronization of the data within the network shared data.  

Once the data is synced in Sugarsync, you can change it and those changes will automatically sync in real time.   But if any new data is added to the folder, you will have to close Sugarsync and reopen again to sync this new data.  A small price to pay to be able to synchronize network shared data.


Wednesday, June 27, 2012

C# Class for Eye-Fi

[Nerd Scale: 5 out of 5 pocket protectors, with tape on my glasses]

Two years ago, I purchased an Eye-Fi memory card for one of my digital cameras.  At the time, the Eye-Fi was one of the only commercial SD Memory Card that had a built in WiFi transmitter.  Basically, with this bad boy in your camera, you can take a picture and have it transmit the image file to your computer over a WiFi connection.

Gone are the days where I would  have to perform the arduous task of connecting my camera via its USB cable to my computer.  My life is now complete.

The purpose of the purchase, other than owning something so awesomely cool, was to hopefully incorporate the Eye-Fi's functionality into a piece a software that I had created for my in-laws business, Snapshots.

Snapshots is a business that creates photographic memorabilia for golf tournaments.   In order to enhance the productivity of the business, I created a software package that would automate most of the steps required to turn a digital picture into a Snapshot.  The one thing that kept the new software from working as smoothly as possible was the fact that a user would still have to physically remove the memory card from the camera in order to plug it into the computer that was running the software.  During a golf tournament, this process could create some serious delays.

After my initial tests of the Eye-Fi hardware and software, it became clear to me that the software that came pacakged with the Eye-Fi was not going to do what I needed it to do.  The transfer times were kind of slow and there was no way to integrate the Eye-Fi software with my software.  It was becoming clear that I was going to have to write my own software to interface with the Eye-Fi transmission.

My first challenge was to understand how the Eye-Fi transmission worked.   The Eye-Fi software was basically a software package that acted as a web server that creates a LISTENING port on port 59278.  I was able to determine this by running netstat commands on my computer, launching the Eye-Fi software and figuring out which ports became active.

The netstat command showing the LISTENING port that Eye-Fi is using
Now that I knew which port it was using for communication, I was able to use Wireshark, a software that can be used to analyze port traffic, to watch the interactions that were taking place between the Eye-Fi SD Card and the Eye-Fi software package.

The process of figuring out the commands was mind-numbingly boring.  I had never taken the time to learn the underling code that is running when your make a request using HTTP protcols.   Who does? Super nerds, that's who.  As an exmaple, if you were to open your browser of choice and type the URL http://www.google.com, the Google website pops up.  Here are the HTTP comands that to happen:

A closer look at one of the GET commands shows the request for the Google nav_logo107.png file:

The GET request made to retrieve the nav_logo107.png file


And the response of the website sending the image:

The RESPONSE the web server send when requesting the nav_logo107.png

As I said before, mind-numbingly boring.  But the understanding of this language was necessary to getting my program to work properly.  I spent about 2 weeks researching HTTP and got to the point where I thought I had a good enough understanding of it to begin work on my program.  

C# was the programming language I was using.   Fortunately, C# has a great HTTPListener class that I could use to create my own web server.   After about a week, I had a functioning C# Class that worked excatly how I wanted and could be incorporated into the program that I had created for Snapshots.  

Here is a video that I created to tell other people about this software: 

If you are interested in the source code for this C# Class, you can find the software at my website.  You are welcomed to download it for free and use it however you wish.   If you find the software useful, come back and say something nice about it on my blog.

The webserver will require a credential string that is unique to each Eye-Fi card.   You can calculate the credential string by creating a hex MD5 hash of a string that consists of:
MAC Address of the Eye-Fi card + CNONCE Key + Upload Key

If you have problems finding any of these keys, please let me know and I will assist in helping you.  Or check out this web group:

http://tech.groups.yahoo.com/group/EyeFiHacking/

Monday, June 18, 2012

iFRO - iPod File Reorganizer

[Nerd Scale: 2 out of 5 pocket protectors]

I love problem-solving.

I find that my personality is well suited for it.  I have just the right combination of O.C.D and A.D.D. that allows me to start a project and usually finish it before being distracted by all the shiny things in my world.

So, when a good friend of mine accidentally deleted all of her music files from her hard drive and did not have any backups from which to restore, I was eager to help.

Fortunately, all her music had been synchronized to her iPod.  This gave me some data that I could use in the recovery process.  Unfortunately, iTunes renames each file to a random, four character file name when it copies music to an iPod which makes it very difficult to determine which file is which.  What to do?

Google searches returned no hits on a software package that would reorganize the music into a real-world library format of Artist | Album | Song Title.   It was clear that I was going to have to write my own program to resolve this problem.

I knew that mp3 and m4a files (Apple's slightly-reworked version of the mp3 format) store data about the song in data holders called ID3 tags, but I didn't really know anything about ID3 tags. Another quick google search led me here:  http://www.id3.org/

This site contained all the information that I needed to begin understanding ID3 tags.   I was able to learn how ID3 tags are constructed and where they exist within the file.  All I needed to do was create a program that would interrogate the files from the iPod and extract the useful data.

After a week or so, a little cursing and a lot of coffee, I had a nice little application that quickly reorganized the music files into a Artist | Album | Song Title format, all based on the ID3 tags.

I named my program iFro, short for iPod File Reorganizer.  Running the program allows the user to take these files:
iPod music files saved as random, four character file names
...extract the ID3 tags and use that information to create the Artist | Album folder structure:

Folder structure created by iFRO
 

...and finally copy and rename the file based on the song title:


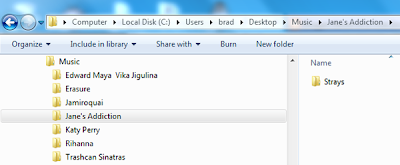
File copied and renamed based off of ID3 tag information


iFRO interface

I have published this program on my website and it can be downloaded for free.   It will only work in a Windows environment and should be pretty straight forward to use.  It is a JAVA application, so you will need JAVA running on your system to use the program. You will also need to transfer the files from the iPod to your computer prior to running the software.  This is easy enough to do with early generation iPods.  Just connect it to your computer via a USB cable and navigate to the \iPod_Control\Music\F00 folder.   You may need to enable the ability to view hidden folders on your computer.   For newer iPods, you can no longer access these folders directly and will need to use a program such as Stellar iPod Recovery to recover the files to your hard drive.

Enjoy the software and leave me a message if you find it useful.

http://www.binkleyit.com/downloads/iFRO.zip